스프링 프레임워크에서는 xml 파일을 통해 컨트롤러와 메서드별로 경로를 연결해 줄 수 있다. 하지만 웹 어플리케이션의 규모가 커지고 복잡해질 수록 xml 파일도 복잡해지고 관리가 어려워진다.
스프링 3.0부터는 어노테이션(Annotation)을 사용해 컨트롤러와 경로를 지정해줄 수 있다.
0. anno-servlet.xml 작성
<?xml version="1.0" encoding="UTF-8"?>
<beans
xmlns="http://www.springframework.org/schema/beans"
xmlns:p="http://www.springframework.org/schema/p"
xmlns:aop="http://www.springframework.org/schema/aop"
xmlns:context="http://www.springframework.org/schema/context"
xmlns:xsi="http://www.w3.org/2001/XMLSchema-instance"
xsi:schemaLocation="http://www.springframework.org/schema/beans
http://www.springframework.org/schema/beans/spring-beans-3.0.xsd
http://www.springframework.org/schema/aop
http://www.springframework.org/schema/aop/spring-aop-3.0.xsd
http://www.springframework.org/schema/context
http://www.springframework.org/schema/context/spring-context-3.0.xsd">

	<bean class="org.springframework.web.servlet.view.InternalResourceViewResolver">
		<property name="viewClass" value="org.springframework.web.servlet.view.JstlView" />
		<property name="prefix" value="/WEB-INF/views/test/" />
		<property name="suffix" value=".jsp" />
	</bean>

	<bean class="org.springframework.web.servlet.mvc.annotation.DefaultAnnotationHandlerMapping" />
	<bean class="org.springframework.web.servlet.mvc.annotation.AnnotationMethodHandlerAdapter" />
	<context:component-scan base-package="com.spring" />

</beans>
* 어노테이션 사용을 위한 클래스
| DefaultAnnotationHandlerMapping | 클래스 레벨에서 @RequestMapping을 처리 |
| AnnotationMethodHandlerAdapter | 메서드 레벨에서 @RequestMapping을 처리 |
* <context:component-scan> 태그
| <context:component-scan base-package="패키지경로"> | - 어노테이션을 사용할 패키지 경로를 지정 - 지정한 패키지에서 어노테이션으로 지정된 클래스를 빈으로 생성 - base-package="com.spring" 의 경우 com.spring 패키지와 그 하위 패키지 모두를 범위로 함 |
* 어노테이션의 종류
| @Controller | 스프링 컨테이너가 component-scan에 의해 지정한 클래스를 컨트롤러 빈으로 자동 변환 |
| @Service | 스프링 컨테이너가 component-scan에 의해 지정한 클래스를 서비스 빈으로 자동 변환 |
| @Repository | 스프링 컨테이너가 component-scan에 의해 지정한 클래스를 DAO 빈으로 자동 변환 |
| @Component | 스프링 컨테이너가 component-scan에 의해 지정한 클래스를 빈으로 자동 변환 |
1. MainController 클래스 작성
package com.spring.ex02;

import javax.servlet.http.HttpServletRequest;
import javax.servlet.http.HttpServletResponse;

import org.springframework.stereotype.Controller;
import org.springframework.web.bind.annotation.RequestMapping;
import org.springframework.web.bind.annotation.RequestMethod;
import org.springframework.web.bind.annotation.RequestParam;
import org.springframework.web.servlet.ModelAndView;

@Controller("memberController")
@RequestMapping("/member")
public class MemberController {

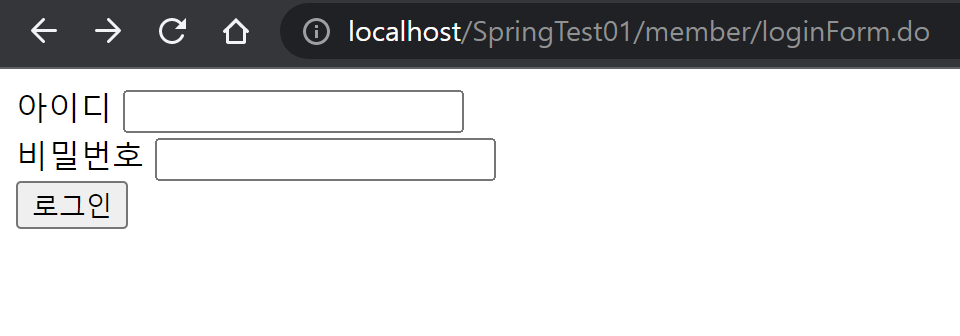
    @RequestMapping(value= {"/loginForm.do", "/loginForm2.do"},
                    method= {RequestMethod.GET, RequestMethod.POST})
    public ModelAndView login(HttpServletRequest request,
                              HttpServletResponse response) {

        return new ModelAndView("loginForm");
    }

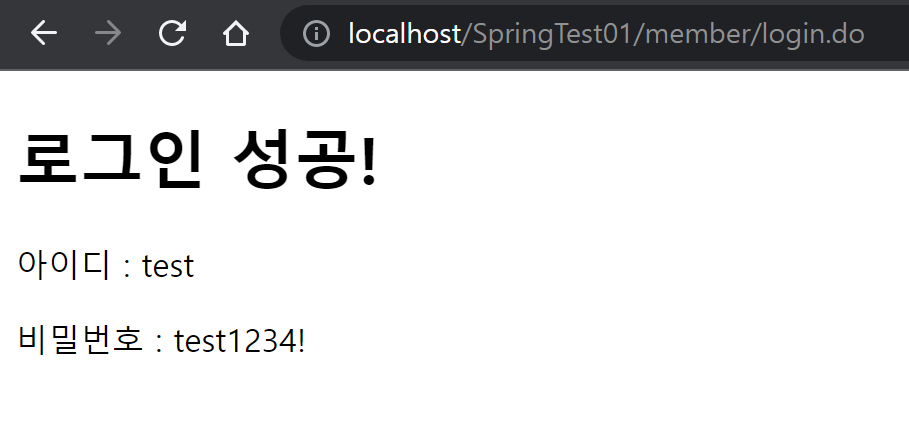
    @RequestMapping(value= "/login.do", method= RequestMethod.POST)
    public ModelAndView loginForm(HttpServletRequest request,
                                  HttpServletResponse response,
                                  @RequestParam("userId") String userId,
                                  @RequestParam(value="userPass", required=true) String userPass) {

        ModelAndView mav = new ModelAndView();
        mav.addObject("userId", userId);
        mav.addObject("userPass", userPass);
        mav.setViewName("result");

        return mav;
    }
}
1. 컨트롤러로 지정할 클래스의 위에 @Controller("컨트롤러명")을 작성한다.
2. 만약 컨트롤러의 최상위에 고정된 경로를 주고 싶다면 클래스에 @RequestMapping("경로명")을 작성한다.
예) 컨트롤러 클래스에 @RequestMapping("/member")가 작성된 경우
@RequestMapping("/login.do")라는 어노테이션이 붙은 메서드가 있을 경우
이 메서드의 전체 경로는 /member/login.do 가 된다.
3. 요청을 처리할 메서드를 작성하고 @RequestMapping("경로명", "요청 방식") 어노테이션을 붙인다.
여러 경로에의 요청을 하나의 메서드로 처리하고 싶을 경우 중괄호('{}')를 사용해 작성할 수 있다. 요청 방식의 경우에도 중괄호('{}')를 사용해 여러 개의 요청 방식을 하나의 메서드로 처리할 수 있다.
* @RequestParam("파라미터명")
@RequestParam 어노테이션을 사용하면 요청에 담겨온 파라미터를 메서드의 파라미터에 미리 꺼내놓을 수 있다. 파라미터로 한글을 받는 경우가 있다면 미리 인코딩 필터를 web.xml에 설정해두는 것이 좋다.
<web-app>

    <filter>
        <filter-name>encodingFilter</filter-name>
        <filter-class>org.springframework.web.filter.CharacterEncodingFilter</filter-class>
        <init-param>
            <param-name>encoding</param-name>
            <param-value>UTF-8</param-value>
        </init-param>
    </filter>

    <filter-mapping>
        <filter-name>encodingFilter</filter-name>
        <url-pattern>/*</url-pattern>
    </filter-mapping>

</web-app>
* @RequestParam(value="파라미터명", required=true)
required 속성은 해당 파라미터의 필요 여부를 설정한다. 만약 true로 설정했을 때 파라미터가 없을 경우, 상태 코드 400을 출력한다. 다만 해당 파라미터의 값의 유무가 아닌 키(Key)의 유무(예를들어 해당 파라미터명과 동일한 'name' 속성값을 가진 input 태그가 존재하는지)를 판단하기 때문에 입력 데이터의 유효성을 판별하기에는 적합하지 않다.

* 실행 결과


'Java > Spring Framework' 카테고리의 다른 글
| [Spring Framework] MyBatis 연동하기 (0) | 2023.01.19 |
|---|---|
| [Spring Framework] Eclipse 스프링 STS 설정하기 (0) | 2023.01.19 |
| [Spring Framework] @RequestParam 과 @ModelAttribute (0) | 2023.01.15 |
| [Spring Framework] 관점 지향 프로그래밍 (Aspect Oriented Programming) (0) | 2023.01.11 |
| [Spring Framework] 의존성 주입 (Dependency Injection) (0) | 2023.01.11 |
